


The Kia Ceed Rear Suspension Arm: Everything You Need to Know
The Kia Ceed, a popular choice for its practicality and reliability, relies on a complex network of components to deliver a comfortable and controlled driving experience. One crucial part of this system is the rear suspension arm. This article delves into the rear suspension arm of the Kia Ceed, exploring its function, common problems, replacement procedures, and essential maintenance tips. Whether you’re a seasoned mechanic or a concerned Ceed owner, this guide provides comprehensive information to keep your car running smoothly.
What Does the Rear Suspension Arm Do?
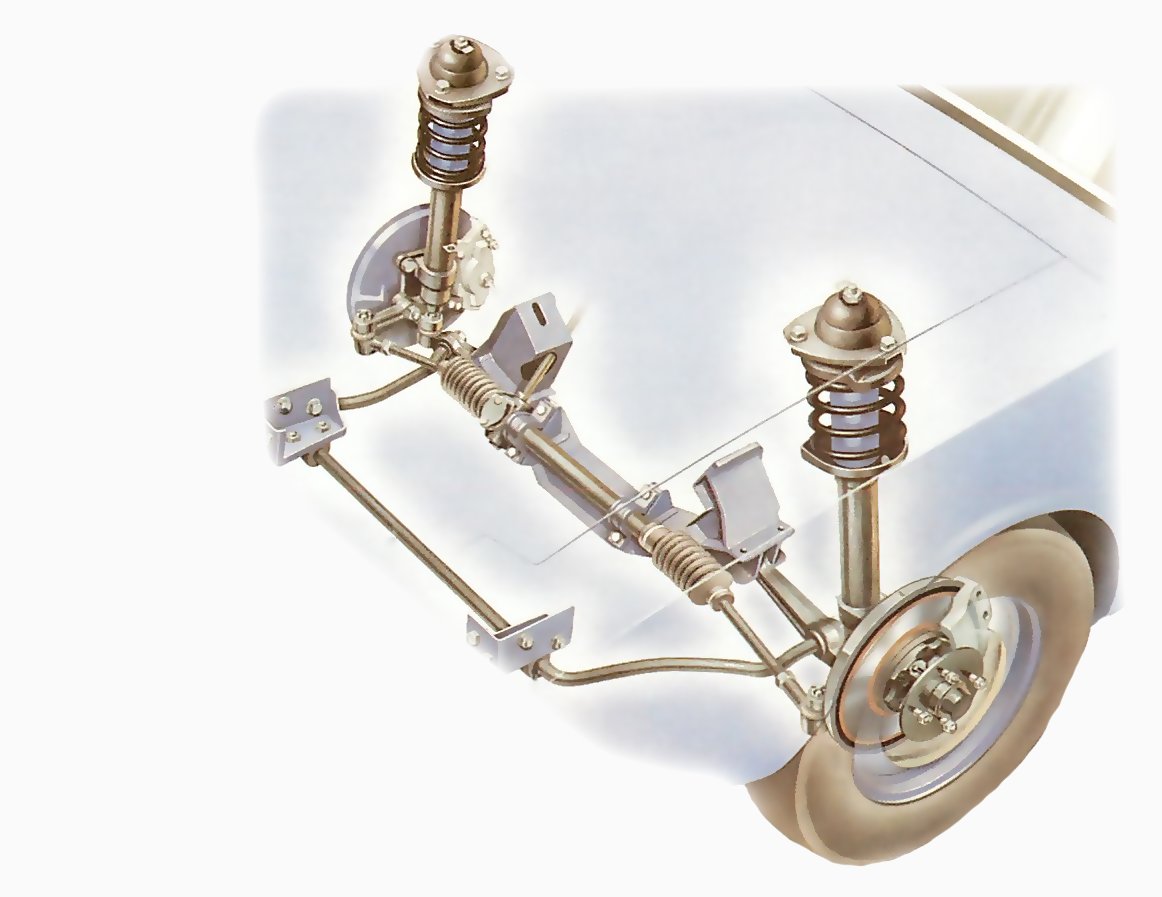
The rear suspension arm, also known as a control arm or wishbone, plays a vital role in maintaining the vehicle’s stability and handling. Its primary functions include:
- Connecting the wheel hub to the chassis: This connection allows the wheel to move up and down, absorbing bumps and irregularities in the road surface.
- Controlling wheel alignment: The suspension arm’s design dictates the wheel’s camber, caster, and toe angles. Correct alignment is crucial for optimal tire wear, handling, and fuel efficiency.
- Transmitting forces: It transmits forces from the wheel to the chassis, including braking, acceleration, and lateral forces during cornering.
- Providing structural support: The arm provides structural support for the wheel assembly, ensuring its integrity under various driving conditions.
Common Problems with Kia Ceed Rear Suspension Arms
Like any mechanical component, the rear suspension arm can be subject to wear and tear. Common issues include:
- Worn bushings: The rubber bushings that connect the arm to the chassis and wheel hub can degrade over time. This can lead to:
- Clunking noises, especially when going over bumps.
- Vibration or instability at higher speeds.
- Reduced handling performance.
- Premature tire wear.
- Bent or damaged arms: Impacts from potholes, curbs, or accidents can bend or damage the arm itself. This can cause:
- Misalignment of the wheels.
- Uneven tire wear.
- Difficulty steering.
- Potential for more severe suspension damage.
- Corrosion: Rust and corrosion, particularly in areas exposed to road salt, can weaken the arm, potentially leading to failure.
Identifying a Faulty Rear Suspension Arm
Recognizing the symptoms of a failing rear suspension arm is crucial for timely repair. Be on the lookout for:
- Unusual noises: Clunking, rattling, or squeaking sounds from the rear of the car, especially when driving over bumps or turning.
- Poor handling: Feeling a loss of control, wandering, or instability, particularly during turns or at higher speeds.
- Uneven tire wear: Noticeable wear patterns on the tires, such as cupping or uneven wear across the tread.
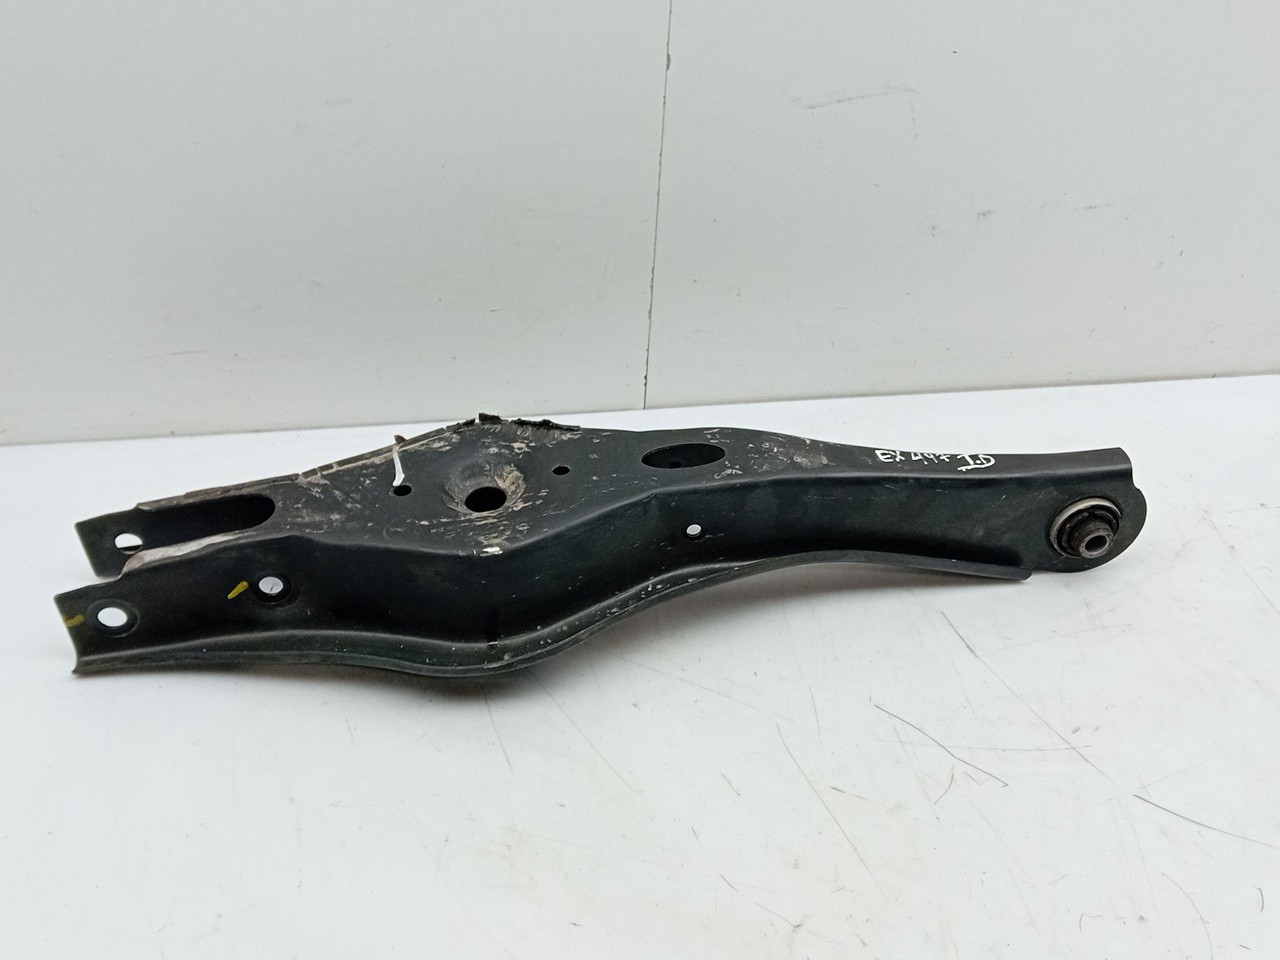
- Visual inspection: Check for any visible damage, such as bends, cracks, or rust on the arm. Inspect the bushings for signs of cracking, dry rot, or excessive movement.
Replacing the Kia Ceed Rear Suspension Arm: A Step-by-Step Guide (General Outline)
Note: This is a general guide. Always consult your Kia Ceed’s service manual for specific instructions and torque specifications. Replacing suspension components can be dangerous if not done correctly. Consider seeking professional help if you are not experienced with automotive repair.
- Preparation: Park the car on a level surface, engage the parking brake, and chock the front wheels. Gather necessary tools: jack, jack stands, wheel chocks, wrench set, socket set, torque wrench, penetrating oil (if needed), and the replacement suspension arm.
- Loosen the lug nuts: Before jacking up the car, loosen the lug nuts on the affected wheel.
- Raise and secure the vehicle: Use the jack to lift the rear of the car and securely support it with jack stands.
- Remove the wheel: Completely remove the wheel.
- Disconnect components: Disconnect any components connected to the suspension arm, such as the brake caliper (secure it safely), ABS sensor wire, and, if applicable, the sway bar link.
- Remove the old suspension arm: Unbolt the old suspension arm from the chassis and the wheel hub. Use penetrating oil if the bolts are rusted.
- Install the new suspension arm: Install the new suspension arm, ensuring proper alignment and torque specifications.
- Reconnect components: Reconnect the brake caliper, ABS sensor wire, and sway bar link.
- Reinstall the wheel: Mount the wheel and tighten the lug nuts to the manufacturer’s specifications.
- Lower the vehicle: Lower the car to the ground.
- Torque the lug nuts: Torque the lug nuts to the manufacturer’s specifications.
- Wheel alignment: Crucially, have a professional wheel alignment performed after replacing the suspension arm. This ensures proper handling and tire wear.
Maintaining Your Kia Ceed’s Rear Suspension
Regular maintenance can help prolong the life of your rear suspension arms:
- Regular inspections: Have your suspension system inspected by a qualified mechanic during routine servicing.
- Avoid harsh driving: Avoid driving over potholes, curbs, and other obstacles that can damage the suspension components.
- Wheel alignment: Maintain proper wheel alignment to prevent premature tire wear and stress on the suspension.
- Lubrication: If your suspension uses grease fittings (zerks), lubricate them according to the manufacturer’s recommendations.
- Listen for unusual noises: Pay attention to any unusual noises or changes in handling, and address them promptly.
Conclusion
The rear suspension arm is a critical component of your Kia Ceed’s handling and safety. Understanding its function, recognizing potential problems, and following proper maintenance practices are essential for a smooth and reliable driving experience. By paying attention to the symptoms and seeking timely repairs, you can ensure your Ceed continues to perform at its best for years to come. Remember to consult your service manual and seek professional assistance when needed.
Frequently Asked Questions (FAQs)
How often should I inspect my Kia Ceed’s rear suspension arms? It’s recommended to have your suspension inspected during routine service intervals, typically every 12 months or 12,000 miles. However, if you notice any unusual noises or handling issues, have it inspected immediately.
Can I replace the rear suspension arm myself? Yes, with the right tools and mechanical knowledge, you can replace the rear suspension arm. However, it’s crucial to follow the manufacturer’s instructions and torque specifications. If you’re not comfortable with the process, it’s best to have a professional mechanic perform the replacement.
What is the cost of replacing a Kia Ceed rear suspension arm? The cost varies depending on the part’s brand, labor charges, and your location. Generally, you can expect to pay between $200 and $600, including parts and labor. It’s always best to get a quote from a trusted mechanic.
Will replacing the rear suspension arm improve my car’s ride quality? Yes, a new rear suspension arm, especially if it’s replacing a worn or damaged one, can significantly improve ride quality and handling. You should notice reduced noise, vibration, and improved stability.
Do I need to replace both rear suspension arms at the same time? It’s generally recommended to replace both rear suspension arms if one has failed or is significantly worn, even if the other seems fine. This ensures balanced handling and even wear on both sides of the vehicle.
