


How to Replace a Vauxhall Astra Water Pump: A Simple Guide
The Vauxhall Astra, a stalwart of the UK’s roads, is known for its reliability. However, like any vehicle, it requires regular maintenance to keep running smoothly. One crucial component that can fail over time is the water pump. This guide provides a step-by-step walkthrough on how to replace the water pump on your Vauxhall Astra, empowering you to tackle this repair yourself and potentially save on costly garage fees. This guide is aimed at those with a basic understanding of car mechanics and a willingness to get their hands dirty.
Understanding the Importance of Your Water Pump
Before diving into the replacement process, it’s essential to understand the water pump’s role. It’s the heart of your engine’s cooling system, responsible for circulating coolant throughout the engine block and radiator. This process dissipates heat, preventing your engine from overheating and suffering catastrophic damage. Signs of a failing water pump include:
- Coolant Leaks: Often visible around the pump itself or underneath the vehicle.
- Overheating Engine: The temperature gauge consistently rises above normal.
- Unusual Noises: Grinding, squealing, or whining sounds coming from the engine.
- Loss of Coolant: Requiring frequent topping up of the coolant reservoir.
If you experience any of these symptoms, it’s crucial to address the issue promptly. Ignoring a failing water pump can lead to severe engine damage, resulting in a much more expensive repair.
What You’ll Need: Tools and Materials
Before you start, gather the necessary tools and materials. Having everything readily available will streamline the process and prevent unnecessary delays.
- New Water Pump: Ensure you purchase the correct water pump for your Astra’s engine size and model year.
- New Coolant: Purchase the recommended coolant type for your Vauxhall Astra. Consult your owner’s manual for specifications.
- Socket Set and Wrenches: Including various sizes to remove bolts and fasteners.
- Torque Wrench: Essential for tightening bolts to the correct specifications.
- Screwdrivers (Flathead and Phillips): For removing various components.
- Drain Pan: To collect the old coolant.
- Jack and Jack Stands: For safely lifting and supporting the vehicle.
- Wheel Chocks: For added safety.
- Coolant Bleed Valve (if applicable): Some Astra models require bleeding the cooling system after replacement.
- Pliers: For removing clamps.
- Work Gloves: To protect your hands.
- Safety Glasses: To protect your eyes.
- Rag or Shop Towels: For cleaning up spills.
- Penetrating Oil (optional): For loosening stubborn bolts.
Step-by-Step Water Pump Replacement Guide
This guide provides a general overview. Always consult your Vauxhall Astra’s specific repair manual for detailed instructions and torque specifications for your model year and engine.
Safety First:
- Park the vehicle on a level surface.
- Engage the parking brake.
- Chock the rear wheels.
- Allow the engine to cool completely. Never attempt this procedure on a hot engine.
- Wear safety glasses and work gloves.
Prepare the Vehicle:
- Raise the front of the vehicle using a jack and secure it with jack stands.
- Locate the coolant drain plug (usually at the bottom of the radiator or on the engine block).
- Place the drain pan beneath the drain plug.
- Carefully loosen and remove the drain plug to drain the coolant.
- Remove the radiator cap to aid draining.
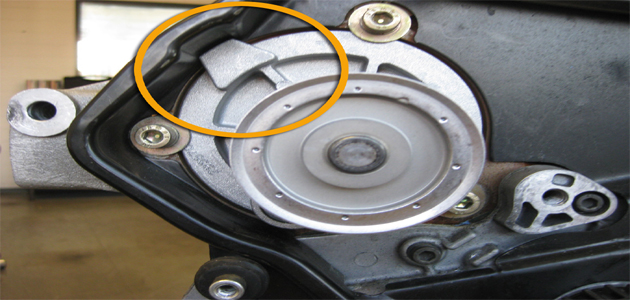
Access the Water Pump:
- Depending on your Astra model, you may need to remove various components to access the water pump, such as the:
- Serpentine belt
- Coolant hoses
- Fan shroud (if applicable)
- Other accessories
- Carefully disconnect any electrical connectors attached to components you remove.
- Take pictures as you disassemble to assist with reassembly.
- Depending on your Astra model, you may need to remove various components to access the water pump, such as the:
Remove the Old Water Pump:
- Locate the bolts securing the water pump to the engine block.
- Loosen and remove these bolts. Penetrating oil can be helpful if the bolts are corroded.
- Carefully remove the old water pump. You may need to gently pry it loose. Be prepared for some remaining coolant to spill.
- Clean the mounting surface on the engine block thoroughly, removing any old gasket material.
Install the New Water Pump:
- Install the new water pump gasket (often included with the new pump).
- Carefully align the new water pump with the engine block.
- Install the new bolts, tightening them gradually and evenly in a crisscross pattern to the manufacturer’s specified torque. Use a torque wrench for accuracy.
Reassemble Components:
- Reinstall the components removed in step 3, such as the serpentine belt, coolant hoses, and fan shroud.
- Reconnect any electrical connectors.
- Ensure all components are securely fastened.
Refill the Cooling System:
- Close the coolant drain plug.
- Slowly fill the cooling system with the correct type of coolant, using the coolant reservoir or radiator cap.
- Fill until the coolant level reaches the “full” mark.
- Some Astra models require bleeding the cooling system to remove air pockets. Consult your repair manual for specific instructions.
Start and Test:
- Start the engine and let it run for a few minutes.
- Monitor the temperature gauge to ensure the engine is not overheating.
- Check for any coolant leaks around the water pump or other components.
- Allow the engine to cool completely.
- Top up the coolant level if necessary.
Final Checks:
- Double-check all connections and fasteners.
- Lower the vehicle.
- Dispose of the old coolant properly.
- Take your Astra for a test drive, monitoring the temperature gauge and checking for any leaks.
Conclusion
Replacing a Vauxhall Astra water pump can be a manageable DIY project, saving you money and providing valuable experience. By following these steps and consulting your vehicle’s repair manual, you can successfully complete this important maintenance task. Remember to prioritize safety throughout the process and always double-check your work. If you are uncomfortable with any aspect of this procedure, it is always best to consult a qualified mechanic.
FAQs
How often should I replace my Vauxhall Astra water pump?
Water pump lifespan varies depending on the vehicle’s usage and the quality of the pump. However, it’s generally recommended to replace the water pump every 60,000 to 100,000 miles, or when you notice any of the symptoms mentioned earlier.
Can I use tap water instead of coolant?
No, using tap water is not recommended. Tap water contains minerals that can corrode the engine components and clog the cooling system. Always use the correct type of coolant specified in your owner’s manual.
What is the best brand of water pump for my Astra?
Reputable brands include Gates, Dayco, and ACDelco. Research and compare reviews to find a water pump that suits your budget and requirements. Consider purchasing a water pump from a trusted auto parts store.
What should I do with the old coolant?
Old coolant is considered hazardous waste and should be disposed of properly. Do not pour it down the drain or into the environment. Take it to a local auto parts store, recycling center, or hazardous waste disposal facility.
